

Key Highlights
- Mastering the barbell deadlift begins with proper form to prevent lower back injuries. This full-body exercise works your legs, back, and core for overall strength. For most people, performing barbell deadlifts 1–2 times per week builds strength while maintaining safe form and allowing adequate recovery.
- .The deadlift is a full-body exercise, engaging major muscle groups in your legs, back, and core for comprehensive strength.
- Beginners should focus on technique over lifting heavy weights, gradually increasing the load through progressive overload.
- Common mistakes include rounding the back and lifting with the arms, which can be avoided with proper setup and core engagement.
- There are several deadlift variations, like the Sumo and Romanian deadlifts, that can modify the exercise to suit different goals and abilities.
Introduction
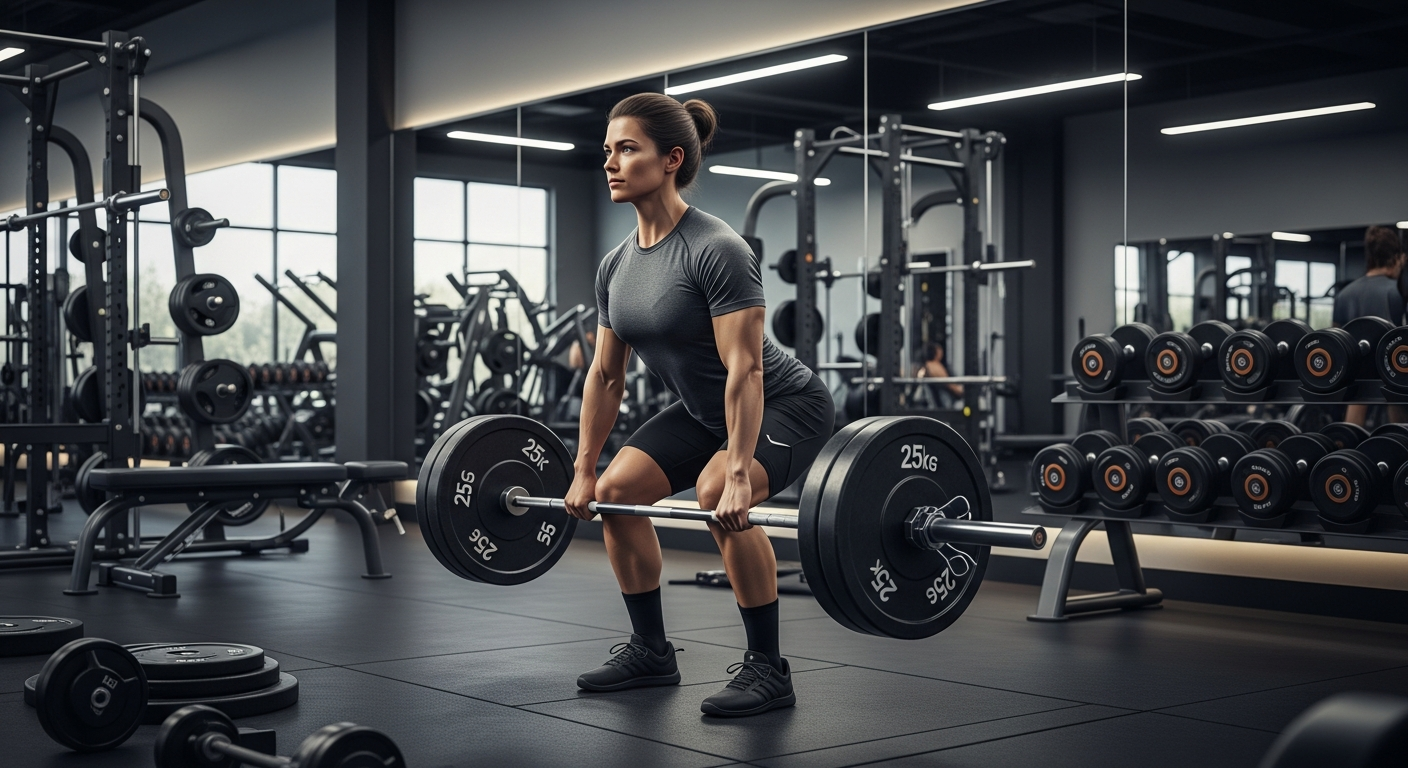
Welcome to the world of strength training! The barbell deadlift is a powerhouse exercise, often seen as a true test of strength. While it might look intimidating, learning the correct deadlift form is your ticket to unlocking incredible full-body power and building a resilient physique. This guide will walk you through everything you need to know, from setting up the bar to performing the lift safely, so you can build strength without risking injury to your lower back. Let's get started on your journey to mastering this fundamental lift.
Understanding the Barbell Deadlift
The barbell deadlift is a fundamental movement in any strength program. At its core, it's about lifting a dead weight from the floor until you are standing upright. The conventional deadlift uses a specific starting position and requires a full range of motion.
This lift is centered around the hip hinge movement, a crucial pattern for both gym performance and everyday life. Understanding the mechanics behind this exercise is the first step toward executing it safely and effectively. We'll explore what a deadlift is and its history in strength training.
What Is a Barbell Deadlift?
So, what exactly is a barbell deadlift? It's a weight training exercise where you lift a loaded barbell from the floor until you are standing completely upright. The term "deadlift" comes from the fact that you are lifting a "dead" weight, meaning it has no momentum and is stationary on the ground before you begin.
The essence of the lift is to move the barbell from its starting position on the floor to a standing position through a full range of motion. This requires engaging multiple muscle groups to break the weight off the floor and pull it up your body in a controlled manner.
Proper deadlift form is crucial. It involves maintaining a rigid spine, keeping your arms straight, and ensuring the barbell travels in a straight vertical line. The lift begins with flexed hips and knees and concludes with full extension of these joints, making it a true display of raw strength.
Brief History and Popularity in Strength Training
The deadlift has long been a cornerstone of strength training, revered by powerlifters, bodybuilders, and athletes for its effectiveness in building muscle and raw power. Its history is rooted in tests of pure strength, where lifting a heavy object off the ground was the ultimate measure of one's ability.
Over time, this fundamental movement has been integrated into modern fitness routines. Barbell training, with the deadlift as a key component, became popular because it effectively targets nearly every muscle in the body. This makes it an efficient way to develop a strong and functional physique.
Today, various deadlift variations are popular among the general population, not just competitive lifters. Its appeal lies in its ability to translate to real-world strength, making it a valuable addition to any training program aimed at improving overall fitness and health.
(ALSO READ: 8 Must-Try Barbell Workouts for Total Body Strength)
Why Barbell Deadlifts Matter for Beginners
If you're new to lifting, the barbell deadlift is one of the most rewarding exercises you can learn. It teaches fundamental movement patterns that are applicable to many other lifts and activities in everyday life. Think about lifting a heavy box or a piece of furniture—that’s a deadlift!
Mastering this lift provides a solid foundation for full-body strength and promotes functional fitness. It's not just about lifting heavy; it's about moving better and more safely in everything you do. Let's look at how it builds strength and its practical benefits.
Full-Body Strength Development
The barbell deadlift is a compound movement, meaning it engages multiple muscle groups across several joints simultaneously. This makes it incredibly efficient for building muscle mass and overall strength. When you lift a heavy barbell with good form, you're challenging your entire body from head to toe.
Your lower body, particularly your glutes and hamstrings, powers the movement through hip extension, while your quadriceps help initiate the lift from the floor. At the same time, your entire back, core, and arms work to stabilize the weight and maintain your posture.
This comprehensive muscle engagement is why the deadlift is considered a king of exercises. It stimulates a significant hormonal response that promotes muscle growth and strength gains throughout your body, making it a highly effective tool in any fitness program.
Functional Fitness and Everyday Benefits
Functional fitness is all about training your body to handle real-life situations with ease. The deadlift is a prime example of a functional exercise because it mimics a movement pattern we use frequently: lifting objects from the ground. By strengthening the muscles involved in this motion, you're better prepared for everyday tasks.
The core of the deadlift is the hip hinge, a fundamental human movement. Learning to hinge properly helps you lift with your legs and glutes instead of your back, significantly reducing the risk of lower back strain when picking up groceries, children, or heavy boxes.
This transfer of strength and skill to everyday life is what makes the deadlift so valuable. It improves your posture, builds explosive power for athletic activities, and increases your resilience to injury. In short, it makes you stronger and more capable in and out of the gym.
The Muscles Worked During a Barbell Deadlift
The deadlift is renowned for being a full-body workout, and for good reason. It recruits an extensive network of muscles to move the weight from the floor to a standing position. Understanding which muscles are working can help you improve your form and appreciate the exercise even more.
We can break down the muscles involved into two categories: primary muscle groups that drive the movement and supporting muscles that stabilize your body. Let's examine which muscles, from the powerful erector spinae to the smaller stabilizers, get a workout.
Primary Muscle Groups Targeted
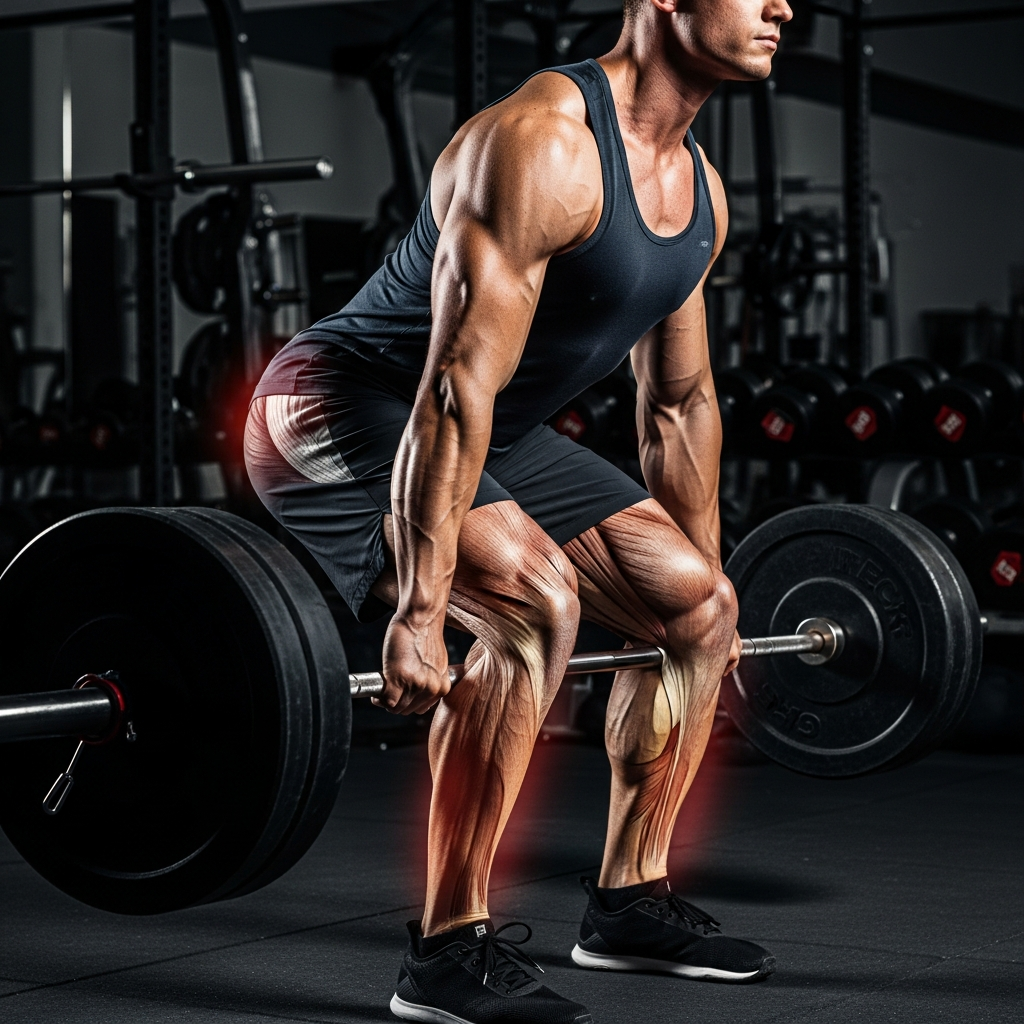
The barbell deadlift primarily targets the muscles of your posterior chain, which are the muscles on the back side of your body. These powerful groups are the main drivers of the lift, responsible for extending your hips and knees to stand up with the weight. Building muscle mass in these areas is a key benefit of the exercise.
Your lower body is the engine of the deadlift. The gluteus maximus, the largest muscle in your body, works with your hamstrings to produce powerful hip extension. Meanwhile, your quadriceps on the front of your thighs help extend your knees to initiate the lift off the floor.
The erector spinae, the muscles running along your spine, contract isometrically to keep your back straight and rigid throughout the movement. This is crucial for transferring force from your legs to the barbell safely and efficiently.
|
Primary Muscle Group |
Function in the Deadlift |
|---|---|
|
Gluteus Maximus |
Powers hip extension to bring you to a standing position. |
|
Hamstrings |
Support hip extension while providing stabilization to the knee joint. |
|
Quadriceps |
Extend the knees to help lift the bar from the floor. |
|
Erector Spinae |
Stabilize the spine, preventing it from rounding. |
Supporting Muscles Engaged
Beyond the primary movers, a host of supporting muscles are engaged to ensure a safe and stable lift. Your latissimus dorsi (lats) play a key role in keeping the barbell close to your body. Think of squeezing your shoulder blades down and back to engage them, which prevents the bar from drifting forward.
Your core muscles, including the transverse abdominis and obliques, work hard to brace your trunk and protect your lower back. Creating intra-abdominal pressure by taking a deep breath and holding it helps stabilize your spine under the heavy load.
Finally, your grip strength is significantly challenged. The muscles in your forearms and hands are responsible for holding onto the bar throughout the lift. This makes the deadlift one of the best exercises for developing a powerful grip, which has benefits for many other exercises and daily activities.
Essential Equipment Needed for Safe Deadlifting
To perform a barbell deadlift safely and effectively, you need the right equipment. While the exercise is simple in concept, having the correct gear can make a significant difference in your form and safety. The basics include a barbell and weight plates.
Beyond the loaded barbell, certain apparel and supportive gear can enhance your stability and performance. As you progress in your barbell training, you may find these accessories helpful. Let's go over the essential and optional equipment for your deadlifting journey.
Choosing the Right Barbell
When it comes to the barbell deadlift, the bar itself is your most important piece of equipment. A standard straight barbell is the most common choice and is ideal for developing raw strength. Most commercial gyms have Olympic barbells, which typically weigh 45 pounds (20 kg).
Some gyms may also have trap bars, also known as hex bars. A trap bar is shaped like a hexagon, and you stand inside it to lift. This design keeps the load in line with your center of gravity, which can be easier on the lower back and is often a good option for beginners.
Regardless of the type, the goal is to lift the bar in a straight line. The design of a straight barbell requires you to actively keep it close to your body, reinforcing good technique. For most people starting with barbell training, a standard straight barbell is the perfect tool for the job.
Weight Plates and Collars
Once you have your barbell, you'll need weight plates to create a loaded barbell. Standard Olympic plates have a consistent diameter, which ensures the bar is at the correct height from the floor. This is important for maintaining proper form from the starting position.
Bumper plates, which are made of dense rubber, are an excellent choice for deadlifting. They are designed to be dropped, which is helpful when handling heavy weights. Using smaller plates can position the bar too low, negatively affecting your form, so it's best to use full-sized plates whenever possible.
Don't forget the collars! These small but crucial accessories secure the weight plates on the barbell, preventing them from sliding off during the lift. Always use collars to ensure your safety and the safety of those around you, especially as you start lifting heavier weights.
Footwear and Apparel for Stability
What you wear on your feet can have a surprising impact on your deadlift. The goal is to create a stable base, so you want shoes with flat, hard soles. Running shoes with soft, cushioned soles are not ideal because they can create instability and absorb the force you're trying to transfer into the ground.
Many lifters prefer minimalist shoes, lifting shoes with a hard, flat sole, or even lifting in their socks. This allows for a solid connection to the floor, enhancing stability and allowing you to drive through your feet more effectively. A stable base makes it easier to maintain a flat back and execute proper movement patterns.
As for apparel, wear something comfortable that doesn't restrict your movement. Tights or shorts are fine, but be aware that the bar will drag along your shins. Some lifters wear long socks or pants to protect their skin. The most important thing is that your clothing doesn't get in the way of your lift.
Optional Supportive Gear (Belts, Straps, Chalk)
As you get stronger, you might consider using supportive gear. While not necessary for beginners, these tools can be helpful when you start lifting heavy deadlifts. It's important to learn to lift without them first so you don't become reliant on them.
A lifting belt can help you brace your core and support your lower back during maximal lifts. It works by giving your abdominal muscles something to push against, increasing intra-abdominal pressure and spinal stability. However, it's a tool, not a crutch for bad form. If you feel pain, you should stop and assess your technique, not just add a belt.
Other common supportive gear includes:
- Lifting straps: These wrap around your wrists and the bar to assist your grip strength when it becomes the limiting factor.
- Chalk: Applying chalk to your hands improves your grip by absorbing sweat and increasing friction, making it easier to hold onto the bar.
Preparing to Deadlift: Warm-Up and Mobility
Never jump straight into a heavy deadlift. A proper warm-up is essential for preparing your muscles and joints for the demands of the lift. A good warm-up increases blood flow, activates your nervous system, and improves your range of motion.
Your preparation should include a dynamic warm-up and specific mobility drills. These will help you practice the hip hinge pattern and ensure your body is ready to move correctly, which is a key part of injury prevention. Let's cover some effective exercises to get you ready to lift.
Dynamic Warm-Up Exercises
A dynamic warm-up involves moving your body through a range of motion to prepare it for your workout. Unlike static stretching, which is best saved for after your session, dynamic movements get your muscles warm and ready for action. This is the perfect way to begin your deadlift preparation.
Focus on exercises that mimic the movements you'll be performing in the deadlift. This helps to groove the hip hinge pattern and activate the key muscle groups. Take a deep breath before each movement and exhale as you complete it, connecting your mind to your body.
Here are a few great dynamic warm-up exercises to get you started:
- Cat-Cow: This move helps to warm up your spine and practice moving between a flexed and extended position.
- Bird-Dog: This exercise improves core stability and coordination, which are crucial for a solid deadlift.
- Bodyweight Good Mornings: This directly mimics the hip hinge and warms up your hamstrings and glutes.
Mobility Drills for Hips and Hamstrings
Having adequate mobility is crucial for performing the deadlift correctly and safely. If your hips and hamstrings are tight, you may struggle to get into the proper starting position without rounding your back. Specific mobility drills can help improve your flexibility and allow for a full range of motion.
Focus on drills that open up your hips and lengthen your hamstrings. This will make it easier to perform the hip hinge and maintain a neutral spine throughout the lift. If you experience pain or discomfort while trying to get into position, it's often a sign that you need to work on your mobility.
Incorporate exercises like leg swings, deep squats, and hamstring scoops into your warm-up routine. Spending a few minutes on these mobility drills before you start lifting can make a huge difference in your form and help prevent injuries, allowing you to get more out of the exercise.
Step-by-Step Guide to Performing a Barbell Deadlift
Now that you're warmed up and understand the basics, it's time to learn how to perform the lift. Following a step-by-step process ensures you set up correctly every time, which is the foundation of good form. From your stance to your grip, every detail matters.
We'll break down the conventional barbell deadlift into four simple steps. By focusing on each part of the process, from the starting position with an overhand grip to the final lockout, you can build the confidence to execute the deadlift with proper deadlift form.
Step 1: Setting Up with Proper Stance and Grip
Your setup is the foundation of a successful deadlift. Start by approaching the bar and positioning your feet so the bar is over the middle of your feet. Your stance should be about hip-width apart, with your feet pointing straight ahead or slightly outward.
Next, hinge at your hips and bend your knees to grip the bar. Your hands should be placed just outside your shins. There are several grip options, but the standard overhand grip is a great starting point for beginners.
Here are the common grip styles:
- Overhand Grip: Both palms face your body. This is the most basic grip and is great for building grip strength.
- Mixed Grip: One palm faces forward and one faces your body. This can help you hold onto more weight but may create muscular imbalances if not alternated.
- Hook Grip: In this method, you first wrap your thumb around the bar, then secure it by placing your fingers over your thumb; although it's a highly stable grip, it may feel awkward or uncomfortable initially.
Step 2: Engaging Your Core and Positioning Your Back
With your stance and grip set, the next step is to get your body into a tight and stable position. Before you lift, it's crucial to set your back and engage your core. Your goal is to maintain a neutral spine throughout the entire lift, which means keeping your back flat from your head to your hips.
To achieve this, squeeze your chest up and pull your shoulder blades down and back, as if you're trying to put them in your back pockets.Engaging your lats will prevent your lower back from rounding. Avoid looking up, as this can strain your neck; keep your head in line with your spine.
Finally, take a deep breath into your belly and brace your core as if you're about to be punched in the stomach. This creates intra-abdominal pressure that supports your spine. Hold this brace throughout the lift to protect your lower back and generate maximum force.
Step 3: Lifting the Bar with Controlled Motion
Now you're ready to lift. The key to a proper deadlift is to initiate the movement by pushing the floor away with your feet, not by pulling with your arms or back. Think of it as a leg press against the ground. This will ensure your legs and glutes are doing the majority of the work.
As you drive with your legs, your hips and shoulders should rise at the same rate. Keep the bar as close to your body as possible, dragging it up your shins and thighs. This ensures an efficient bar path and keeps the weight over your center of mass. Your arms should remain straight throughout the lift, acting like hooks connecting you to the bar.
Once the bar passes your knees, drive your hips forward forcefully to complete the hip extension. This powerful thrust is what brings you to a standing position. Focus on a smooth, controlled motion rather than a jerky pull. Proper deadlift form is about strength and control, not speed.
Step 4: Lockout and Returning the Bar Safely
At the top of the movement, you should be in a fully standing position. Your hips and knees are extended, and your shoulders are back. Squeeze your glutes at the top to complete the lockout, but avoid hyperextending or leaning back. Stand tall and proud, like you're at attention.
The lift isn't over until the bar is safely back on the floor. A safe return is just as important as the lift itself for maintaining proper deadlift form. To lower the weight, reverse the motion: hinge at your hips first, pushing your butt back until the bar passes your knees.
Once the bar is below your knees, you can bend your knees to lower it the rest of the way to the floor. Maintain control and keep your core braced throughout the descent. Don't just drop the weight from the top. A controlled return sets you up for your next rep and reinforces good habits.
Common Mistakes Beginners Should Avoid
As with any complex exercise, there are common mistakes that beginners often make. Being aware of these pitfalls is the first step to avoiding them and developing proper form from the start. Poor technique can not only limit your progress but also increase your risk of injury, particularly lower back strain.
Focusing on a few key areas, such as back position and bar path, can make a huge difference in your deadlift form. Let's look at the most frequent errors and how you can correct them to ensure you're lifting safely and effectively.
Rounding the Back
One of the most common and dangerous mistakes in the deadlift is rounding the lower back. When your back rounds, the load shifts from your powerful leg and hip muscles to the vulnerable structures of your spine, putting you at risk for injury. The goal is always to maintain a neutral spine.
A flat back allows for the safe and efficient transfer of force from your legs through your torso to the barbell. This position is created during the setup by engaging your core and pulling your shoulder blades back. If you find your back rounding during the lift, the weight is likely too heavy, or you need to work on your setup.
To prevent a rounded back and promote injury prevention, focus on these cues:
- Squeeze your chest up: This helps set your upper and mid-back.
- Brace your core: Create tension in your abdomen to support your spine.
- Lower the weight: If you can't maintain a flat back, reduce the weight until you can perfect your form.
Using the Arms Rather Than the Legs to Lift
A deadlift is primarily a lower body exercise. The power comes from your legs and hips, not your arms. A frequent mistake is trying to pull the bar up with your arms, essentially turning the lift into a bicep curl. This is inefficient and puts unnecessary strain on your arms and shoulders.
Your arms should act as ropes or hooks, remaining straight and simply connecting your body to the bar. All the force should be generated from your lower body pushing the ground away. Think about initiating the movement with a powerful leg drive, similar to a leg press.
Focus on the hip hinge movement and let your glutes and hamstrings do the heavy lifting. Proper knee flexion at the start allows your legs to get into an optimal position to generate force. By focusing on pushing with your legs, you'll engage the correct muscles and build functional strength and muscle mass.
Incorrect Bar Path or Foot Placement
The most efficient bar path is a straight line. If the bar swings away from your body, it becomes much harder to lift and places more stress on your lower back. This often happens due to an incorrect starting position or a failure to engage the lats.
Your setup is key to a good bar path. Make sure the bar starts over the middle of your feet. If it's too far forward, it will pull you off balance. A narrow stance, about hip-width apart, helps keep your arms vertical and the bar path straight.
To maintain a vertical bar path, remember to:
- Keep the bar close: Actively pull the bar into your shins and thighs as you lift.
- Engage your lats: Squeezing your lats helps keep the bar from drifting forward.
- Start with the bar over the middle of your feet: This ensures your center of gravity is aligned correctly from the beginning.
- Popular Barbell Deadlift Variations and When to Use Them
The conventional deadlift is a fantastic exercise, but it's not the only way to pull weight from the floor. There are several popular deadlift variations that can be used to target muscles differently, accommodate for mobility limitations, or simply add variety to your training.
Exploring different deadlift variations can help you find what works best for your body and your goals. Whether you want to focus on specific muscles or find an alternative that feels more comfortable, there's likely a variation for you. Let's compare some of the most common options, from the sumo deadlift to the trap bar deadlift.
Conventional vs. Sumo Deadlift
The two most popular barbell deadlift styles are conventional and sumo. The primary difference between them is your foot and hand placement. The conventional deadlift uses a narrow stance, with your feet about hip-width apart and your hands gripping the bar outside your legs.
In contrast, the sumo deadlift utilizes a much wider stance, with your toes pointed outwards and your hands gripping the bar inside your legs. This change in stance alters the biomechanics of the lift significantly. The sumo deadlift shortens the range of motion and allows for a more upright torso, which can reduce stress on the lower back.
The choice between conventional and sumo often comes down to personal preference and body mechanics. Lifters with longer torsos and shorter arms might prefer conventional, while those with longer legs might find sumo more comfortable. Both are excellent for building strength.
|
Feature |
Conventional Deadlift |
Sumo Deadlift |
|---|---|---|
|
Stance |
Narrow, hip-width apart |
Wide, with toes pointed out |
|
Grip |
Outside the legs |
Inside the legs |
|
Torso Position |
More bent over |
More upright |
|
Primary Muscles |
Hamstrings, glutes, lower back |
Quads, glutes, inner thighs |
Romanian Deadlift for Hamstring Focus
The Romanian Deadlift, or RDL, is a fantastic variation for specifically targeting your hamstrings and glutes. Unlike a conventional deadlift, the RDL starts from a standing position and involves a much smaller range of motion. The focus is entirely on the hip hinge.
To perform an RDL, you hold the bar and hinge at your hips, pushing your butt back while keeping your legs relatively straight (with only a slight bend in the knees). You lower the bar until you feel a deep stretch in your hamstrings, typically to about mid-shin level, before returning to the starting position.
Because the weight never touches the ground, the RDL keeps constant tension on your hamstrings and glutes, making it an excellent accessory exercise for building posterior chain strength. It's also a great tool for teaching and reinforcing the proper hip hinge movement pattern.
Trap Bar Deadlift for Lower Back Relief
The trap bar deadlift, also known as a hex bar deadlift, is a beginner-friendly variation that can be easier on the lower back. The unique hexagonal shape of the trap bar allows you to stand inside it, placing the weight directly in line with your center of gravity.
This alignment allows for a more upright torso position, reducing the shear forces on the spine and minimizing lower back strain. The handles are also at your sides, which puts your hands in a neutral grip position. This can feel more natural and is often easier on the shoulders and for your grip strength.
Because it's a hybrid between a squat and a deadlift, the trap bar deadlift is a great teaching tool for learning how to lift heavy weight from the floor. It allows you to build confidence and strength before progressing to a straight bar, and it's a fantastic exercise in its own right for overall power development.
How Much Weight Should You Start With?
One of the most common questions from beginners is, "How much weight should I lift?" When it comes to the deadlift, the answer is always to start light. The primary focus for a beginner should be on mastering good form, not on lifting heavy weights. Choosing the right amount of weight is crucial for learning the movement correctly and safely.
Your starting strength will be unique to you, and it's important not to compare yourself to others. The goal is to select a weight that allows you to perform the exercise with perfect technique while still being challenging. From there, you can apply the principle of progressive overload to gradually increase the weight as you get stronger. Let's discuss how to find your starting point and progress from there.
Assessing Your Starting Strength
Finding your starting strength is a process of trial and error. A good approach is to begin with a very light weight, or even just the empty barbell, to practice the movement pattern. An empty Olympic barbell weighs 45 pounds, which may be a suitable starting point for many people.
Don't be afraid to start with a weight that feels too easy. This allows you to focus solely on your technique without being fatigued by heavy weights. Perform a set of 5-8 reps and honestly assess how it felt. If you maintained perfect form and the weight moved easily, you can add a small amount of weight for your next set.
Avoid the temptation to load the bar with as much weight as you think you can lift. Unlike lifts like the bench press, where you might have a spotter, the deadlift is all on you. It's far better to start cautiously and build a solid foundation than to risk injury by going too heavy too soon.
Guidelines for Progressive Overload
Progressive overload is the principle of continually increasing the demands on your muscles to stimulate growth in strength and muscle mass. For beginners, this is most easily achieved by gradually adding weight to the bar over time. The key is to do this in a structured and sustainable way.
An easy yet efficient approach involves increasing the weight on your deadlift slightly every time you train. For example, you could add 5-10 pounds to the bar each week. As long as you can complete all your reps with good form, you are ready to increase the weight for your next workout.
Here are some guidelines for applying progressive overload:
- Add small increments: Use the smallest plates available to make gradual jumps in weight.
- Focus on form: Never sacrifice good form to lift more weight. If your form breaks down on the next rep, the weight is too heavy.
- Listen to your body: Progress isn't always linear. It's okay to have days where you stick with the same weight to solidify your technique.
How different is this from Barbell Deadlift? : r/Fitness
The Barbell Deadlift primarily targets the posterior chain, including the hamstrings, glutes, and lower back. In contrast, variations like the sumo deadlift emphasize different muscle groups and stances. Understanding these differences is crucial for tailoring your workout to meet specific fitness goals and ensure safe lifting practices.
Conclusion
In conclusion, mastering the barbell deadlift is not just about lifting heavy weights; it's about developing a solid foundation for strength and fitness. By understanding the proper techniques, equipment, and common pitfalls, you can maximize the benefits of this powerful exercise while minimizing the risk of injury. Remember to prioritize your form over the amount of weight you lift and gradually progress at a pace that feels right for your body. If you're ready to take your lifting skills to the next level, don’t hesitate to reach out for guidance or support. Happy lifting!
reference:
https://www.ncbi.nlm.nih.gov/pmc/articles/PMC7046193/
https://www.ncbi.nlm.nih.gov/pmc/articles/PMC6059276/
https://gfycat.com/separaterealcheetah-above-the-knees-rack-pulls-strength-training
https://gfycat.com/importanttartbeauceron
https://strongfirst.skilltrain.com/Pages/Public/Courses
https://pubmed.ncbi.nlm.nih.gov/2796409/
https://pubmed.ncbi.nlm.nih.gov/25559899/
https://www.researchgate.net/publication/301887259_Exercise_Highlight_The_Sumo_Deadlift
https://www.maxpixel.net/Dumbbell-Fitness-Room-Sport-Weights-1966247
https://journals.plos.org/plosone/article
